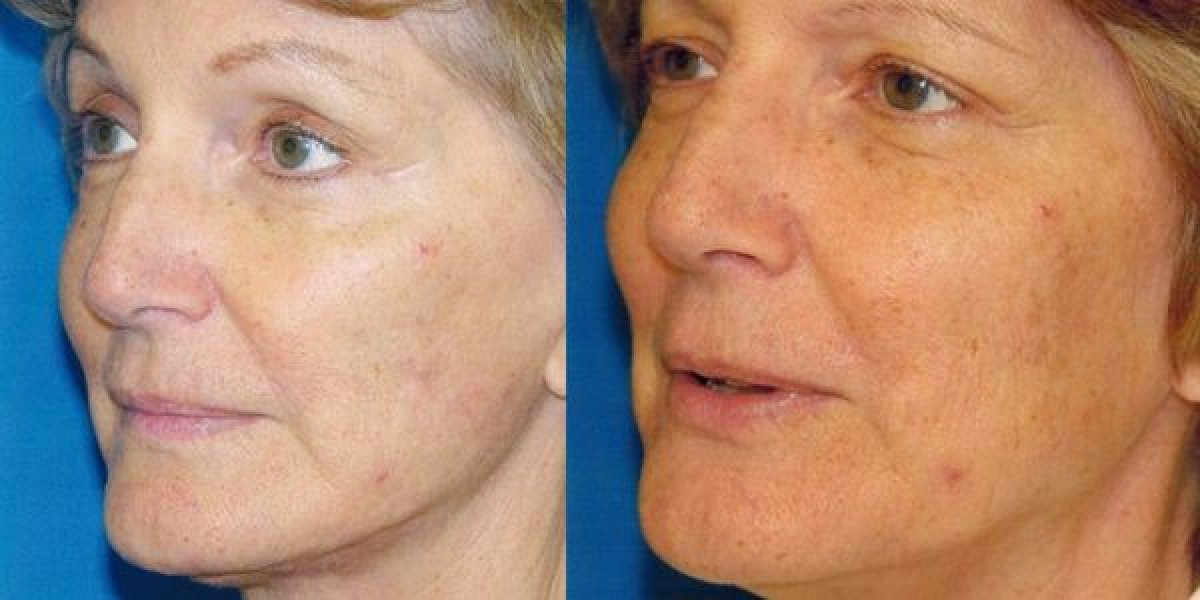
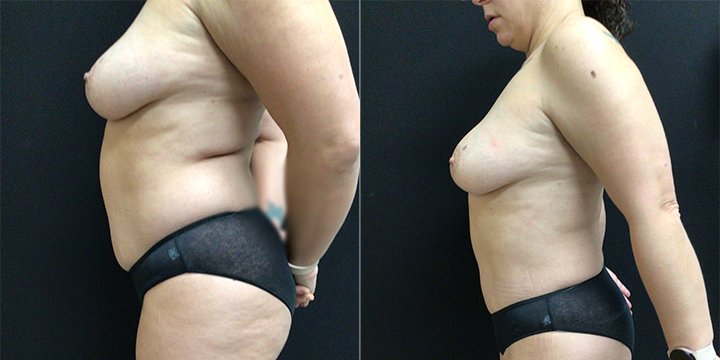
/* Base gallery layout */ .ba-hero { position: relative; } .ba-img { object-fit: cover; aspect-ratio: 3/2; } @supports not (aspect-ratio: 1) { .ba-img{ height:260px; } } .ba-control { width: 12%; } .ba-chevron{ font-size: 40px; line-height: 1; padding:.25rem .5rem; background:#fff; border:1px solid #203F7A; border-radius:.25rem; box-shadow: 0 2px 8px rgba(0,0,0,.08); color:#000; } .ba-thumbs img.ba-thumb{ width:64px; height:64px; object-fit:cover; border:1px solid #203F7A; border-radius:.25rem; margin:.125rem; cursor:pointer; transition:transform .15s ease, box-shadow .15s ease, border-color .15s ease; } .ba-thumbs img.ba-thumb:hover{ transform:scale(1.03); box-shadow:0 2px 8px rgba(0,0,0,.08); } .ba-thumbs img.ba-thumb.active{ border-color:#000; } /* Small helpers */ .ba-case .btn { letter-spacing:.02em; } .ba-thumbs { gap:.25rem; } BACK TO GALLERY GO TO PROCEDURE Face Gallery Brow Lift — BEFORE & AFTER PHOTOS ❮Previous ❯Next VIEW CASE ❮Previous ❯Next VIEW CASE ❮Previous ❯Next VIEW CASE ❮Previous ❯Next VIEW CASE ❮Previous ❯Next VIEW CASE ❮Previous ❯Next VIEW CASE ❮Previous ❯Next VIEW CASE ❮Previous ❯Next VIEW CASE Liposuction Before & After — Patient #1 Close Liposuction Before & After — Patient #2 Close Liposuction Before & After — Patient #3 Close Liposuction Before & After — Patient #4 Close